VPS Plans
You can set the designated resources of the servers in VPS plans and easily create a virtual server from a VPS plan.
To view and create VPS plans, click "Virtualization" -> "VPS Plans" at the sidebar.
VPS Plan Overview
The table offers a clear overview of the created VPS plans with information about the used virtualization and the plan resources (CPU, etc.)
Create a new VPS Plan
First, you need to add the provider. Please see following page. Then click on the plus button to get to the creation form.
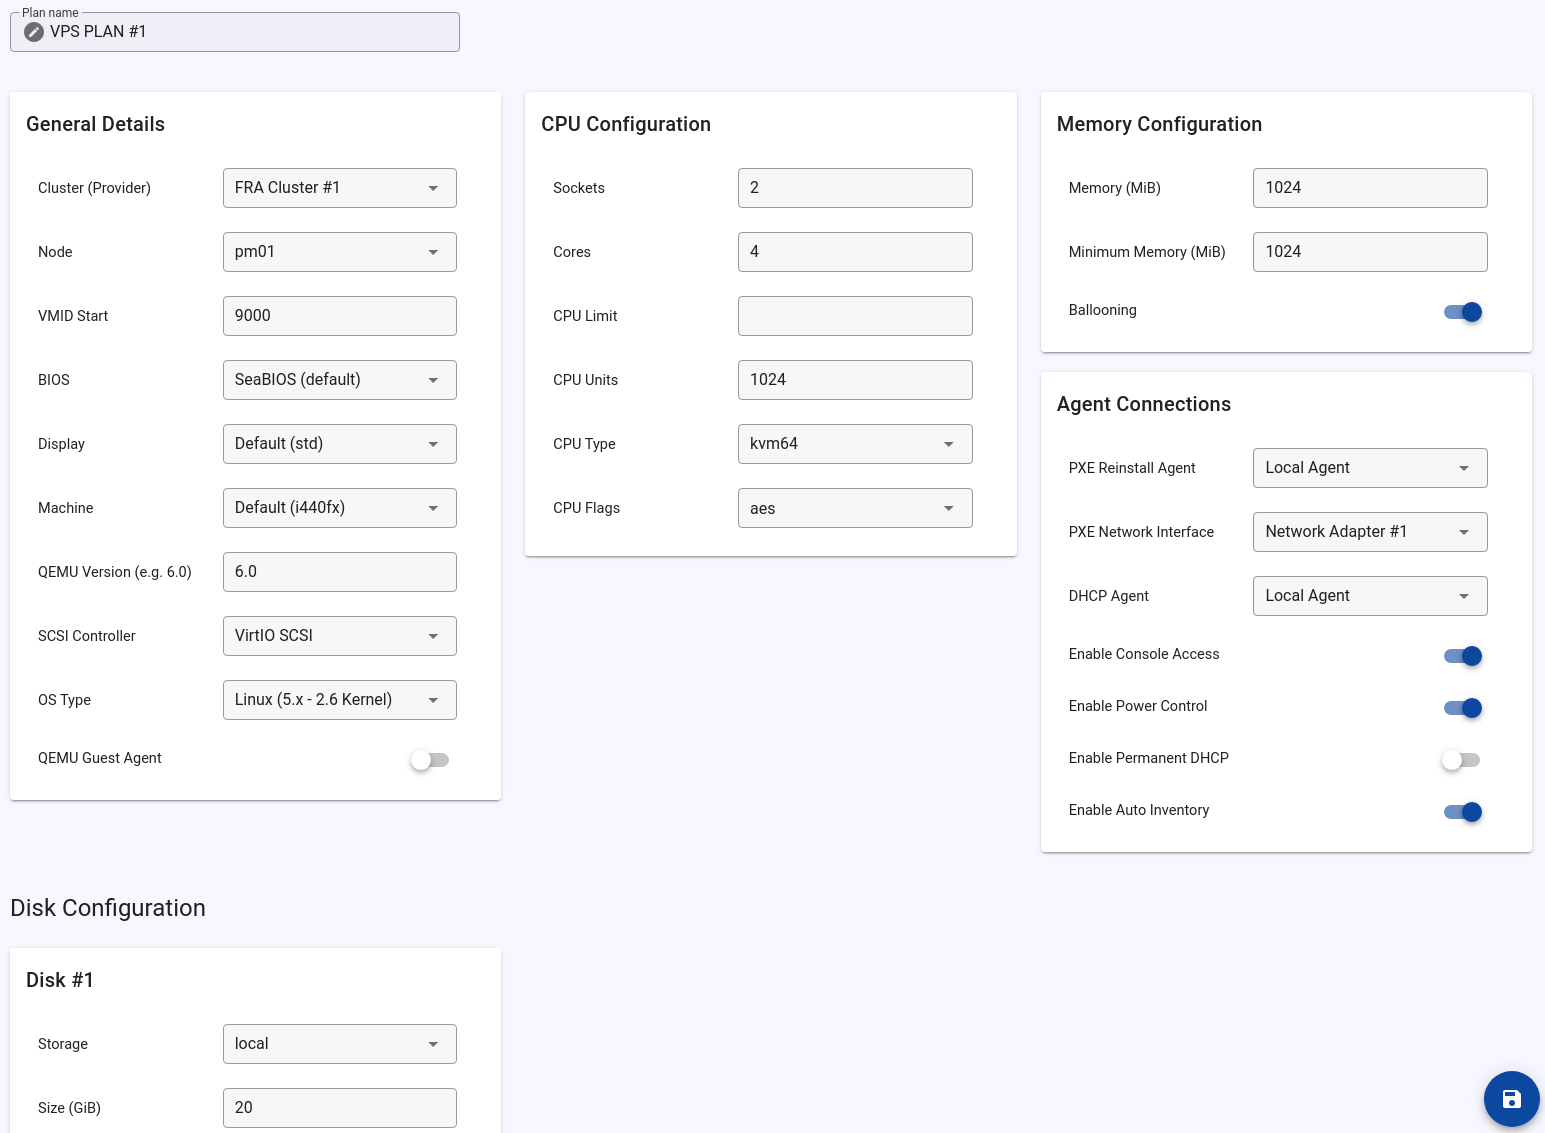
Depending on the used virtualization platform, the available options differ a bit.
Many fields are pre-filled, these are the recommended values, and most fields should be self-explanatory. In the following, we will go into fields that may need explanation.
Agent Connections
Here you specify which connections are assigned to the server, which Agent should be used, and which features of the connections should be enabled.
The following options are available:
- PXE Reinstallation Agent
- PXE Network Interface (if multiple network interfaces are assigned to the virtual server)
- DHCP Agent
- Enable Console Access
- Enable Power Control
- Enable Firewall Management (Proxmox)
- Enable Permanent DHCP
- Enable Auto Inventory
Auto inventory queries the virtual server's hardware data via the API and then displays it in Tenantos.
Server Tags
The defined tags are automatically added to newly created servers. Tagging can be useful if you limit operating systems or subnets to servers with certain tags. This functionality can be used, for example, to restrict access to the Windows operating system.
Backup & Snapshot Configuration
Provider Availability
Backup and snapshot functionality is currently only available for Proxmox.
Individual Server Configuration
Backup and snapshot settings configured in the VPS plan serve as templates. Once a server is created, these settings are copied to the server's Proxmox connection assignment where they can be modified individually. More information about connection assignments can be found here.
The configured settings are copied to the VPS connection assignment when the server is created and can be configured individually per server afterwards.
You can configure default values for backup and snapshot settings even when these features are disabled in the VPS plan. This allows billing integrations to control feature availability while preserving all configured settings like storage locations and compression methods. Setting maxBackups or maxSnapshots to a positive value will automatically enable the respective feature. More information about VPS resource overrides can be found here.
Backups
When enabled, backup functionality becomes available for servers created from this plan. You can configure backup limits, storage options, and default settings.
Max Backups
Set the maximum number of backups that can be stored simultaneously for servers using this plan. Leave empty for unlimited backups.
Available Backup Storages
Select which backup storage locations are available for servers created from this plan. Multiple storages can be selected to provide flexibility when creating backups. A default backup storage can be selected that will be pre-selected when creating backups.
Leave empty to allow all storages.
Other options
Additional options include backup modes (snapshot, suspend, stop) and compression methods (None, GZIP, LZO, ZSTD) with configurable defaults.
Snapshots
When enabled, snapshot functionality becomes available for servers created from this plan. You can configure snapshot limits and memory inclusion settings.
Max Snapshots
Set the maximum number of snapshots that can be stored simultaneously for servers using this plan. Leave empty for unlimited snapshots.
Default Include Memory
Choose whether memory state should be included in snapshots by default. Including memory creates larger snapshots but allows for exact restoration of the server's running state.
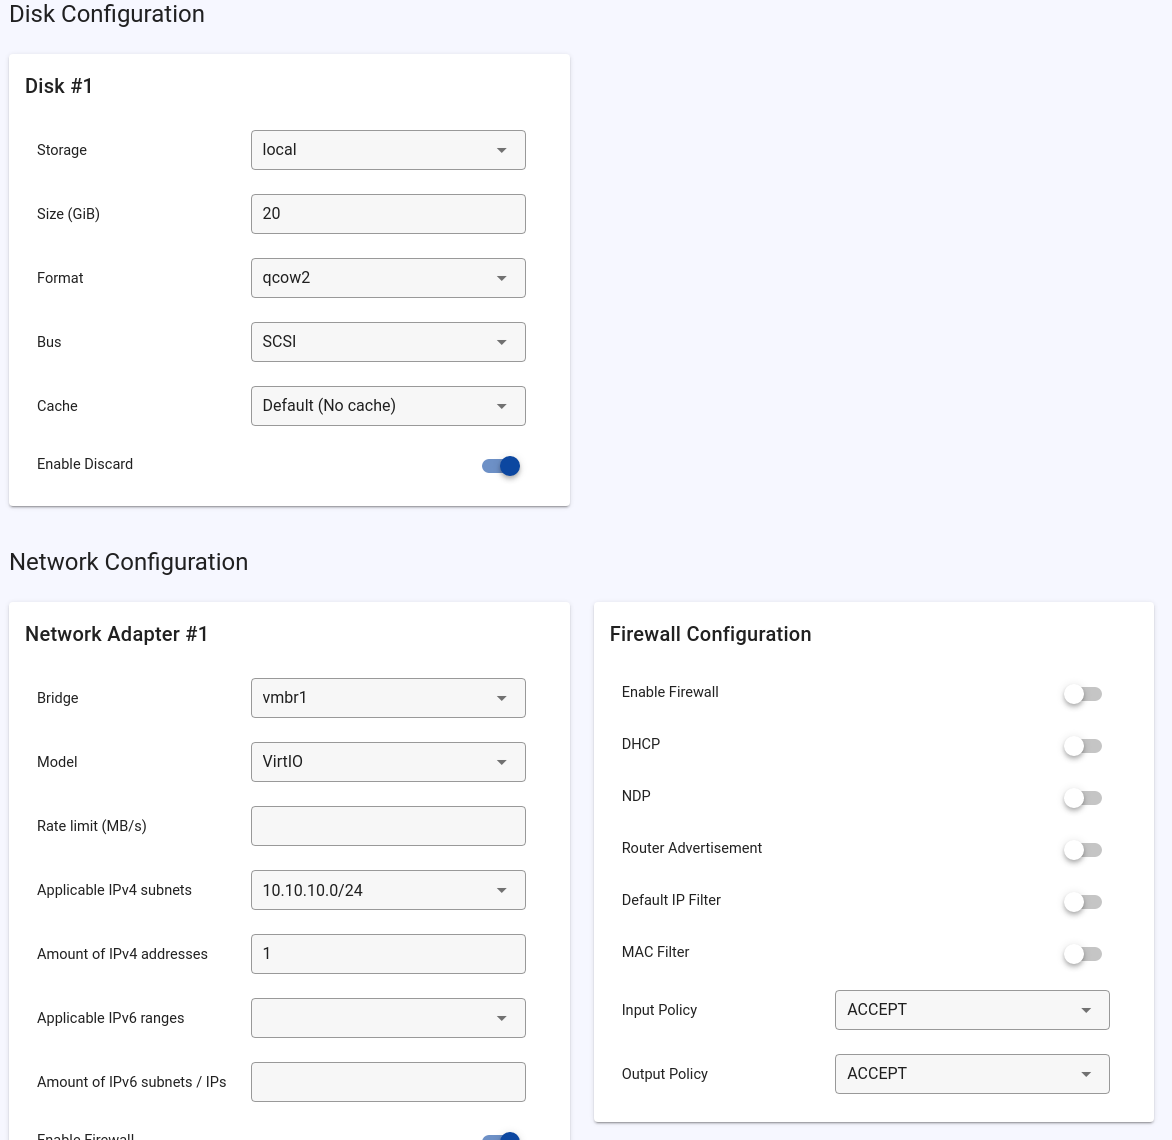
Firewall Configuration
To let customers manage firewall rules directly on the server page, enable the "Firewall Management" connection feature (see Agent Connections). Both this feature and the firewall itself must be enabled for the rules and the IP spoofing filter to take effect. More information can be found on the Proxmox firewall page.
Default IP Filter (Proxmox)
Quote from Proxmox documentation:
Enable default IP filters. This is equivalent to adding an empty ipfilter-net
ipset for every interface. Such ipsets implicitly contain sane default restrictions such as restricting IPv6 link local addresses to the one derived from the interface’s MAC address. For containers the configured IP addresses will be implicitly added.
This is the global firewall "IP Filter" option. For most setups it is not relevant and does not need to be enabled, because it does not add the assigned IPs by itself. The per-interface "Create IP Spoofing Filter" below is the option that creates the IP set and fills it with the assigned IPs.
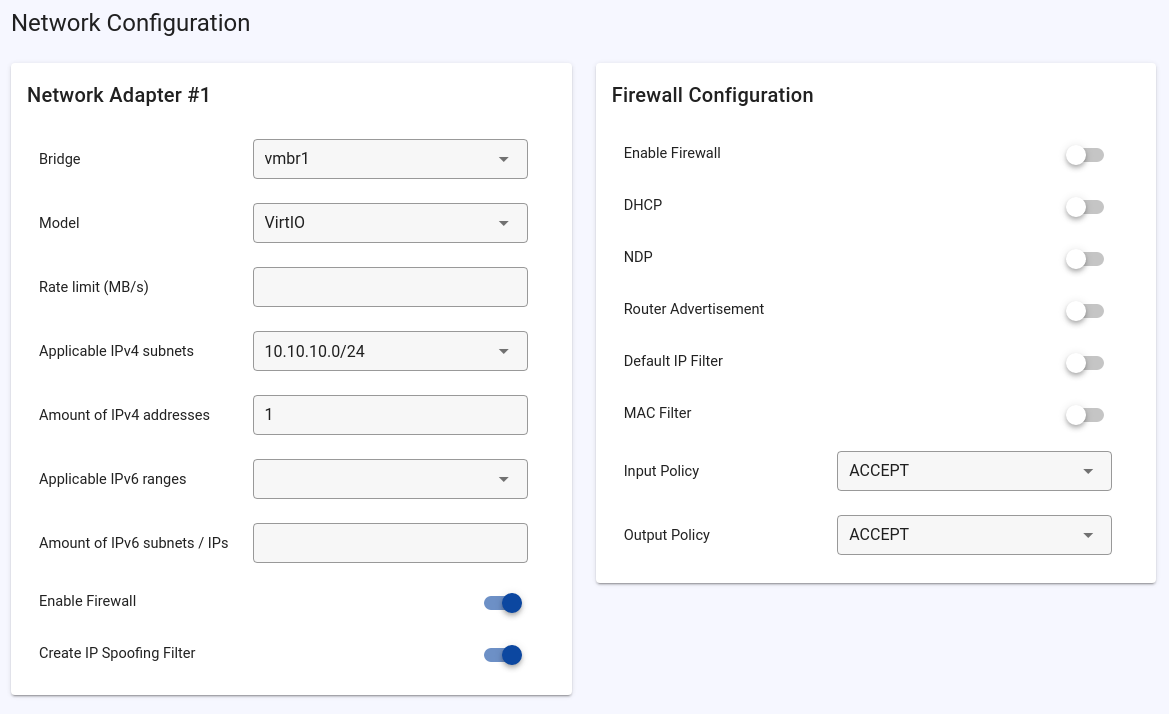
Network Configuration
Only options that require explanation are listed.
Create IP Spoofing Filter (Proxmox)
This is a per-interface setting. It creates an ipfilter-net
Unlike the VM-level "Default IP Filter" option, which applies to all interfaces, this filter is scoped to the individual network interface and holds the specific IPs assigned to the server. The "Default IP Filter" option does not need to be enabled for this per-interface filter to work, since it creates its own IP set.
It's recommended to enable this option. For the IP filter to take effect, the firewall must be enabled at both levels: the "Enable Firewall" option in the "Firewall Configuration" card (the VM firewall) and the "Enable Firewall" option on the network adapter (the per-interface firewall flag). Without both, the IP filter has no effect.
Programmatically change VPS plan resources on the fly
To programmatically adjust VPS plans, use the modifier methods. This allows for dynamic configuration of resources and overwriting the selected node. Further information can be found here.
Screenshots