Branding
Note
All described settings can be configured individually for each brand. Resellers, with the "Manage Brands" permission, can manage the settings themselves.
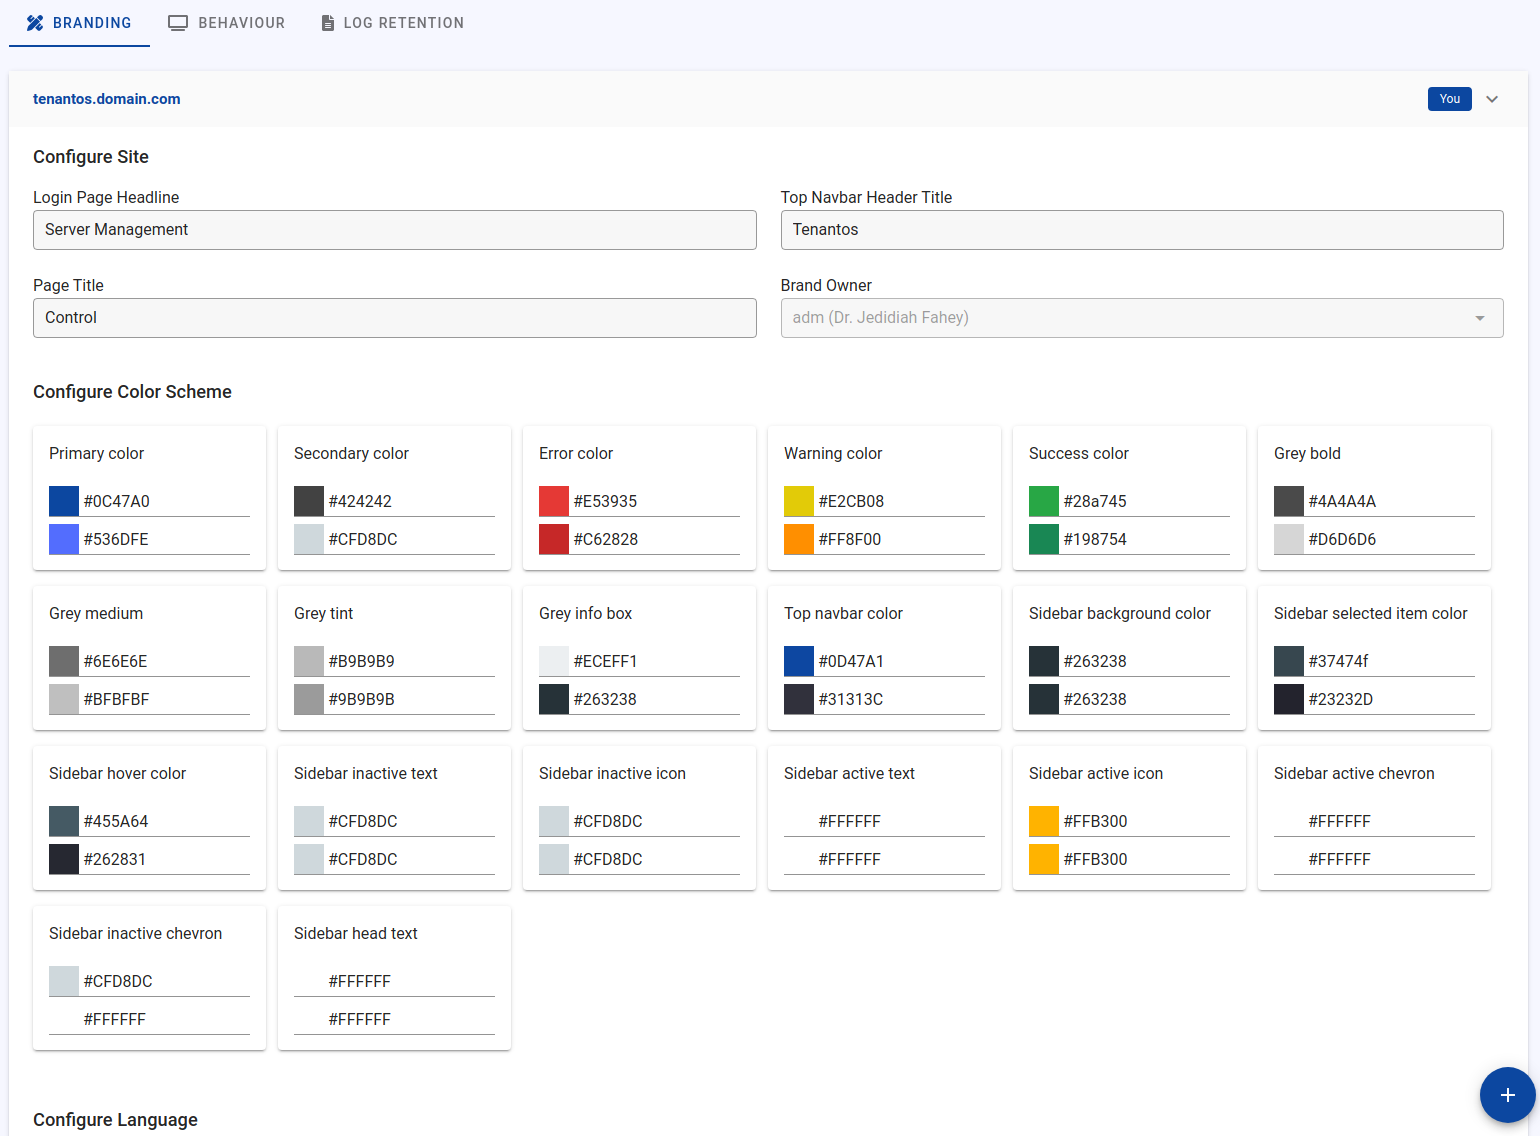
You can customize the web interface of Tenantos to match your branding. The following options are available:
- Customize sidebar title.
- Customize page title.
- Customize login page text.
- Customize color scheme (light / dark).
- Upload logos (favicon, light / dark)
- Update language definition.
The domain, which you provided during the installation of Tenantos, is added by default to the brands list.
Information about default values
When a reseller creates a brand, the default values for the brand are taken from the parent reseller's brand.
The Tenantos interface allows brand owners to reset the color scheme to its original state - the original values are taken from the parent account holder's brand (i.e. if the reseller is owned by another reseller, the default values for the brand are taken from the parent reseller account, not from the Tenantos admin brand. This ensures that the brand maintains a consistent appearance and follows the guidelines set by the parent reseller.).
Add New Brands
On the left sidebar, click the menu entry "Settings" and then click on "Branding" at the navigation bar. Click the plus sign icon to add a new brand / domain.
You will be prompted to add a CNAME DNS record to the new domain. If the DNS validation was successful, Tenantos will add the domain to the web server.
Users with the permission to create brands (usually resellers) can also add brands. In this case, the domain of the parent reseller will be shown as CNAME target.
Update Brands
The web interface is straightforward. Each brand / domain can be configured individually. All changes are applied immediately, without reloading the page.
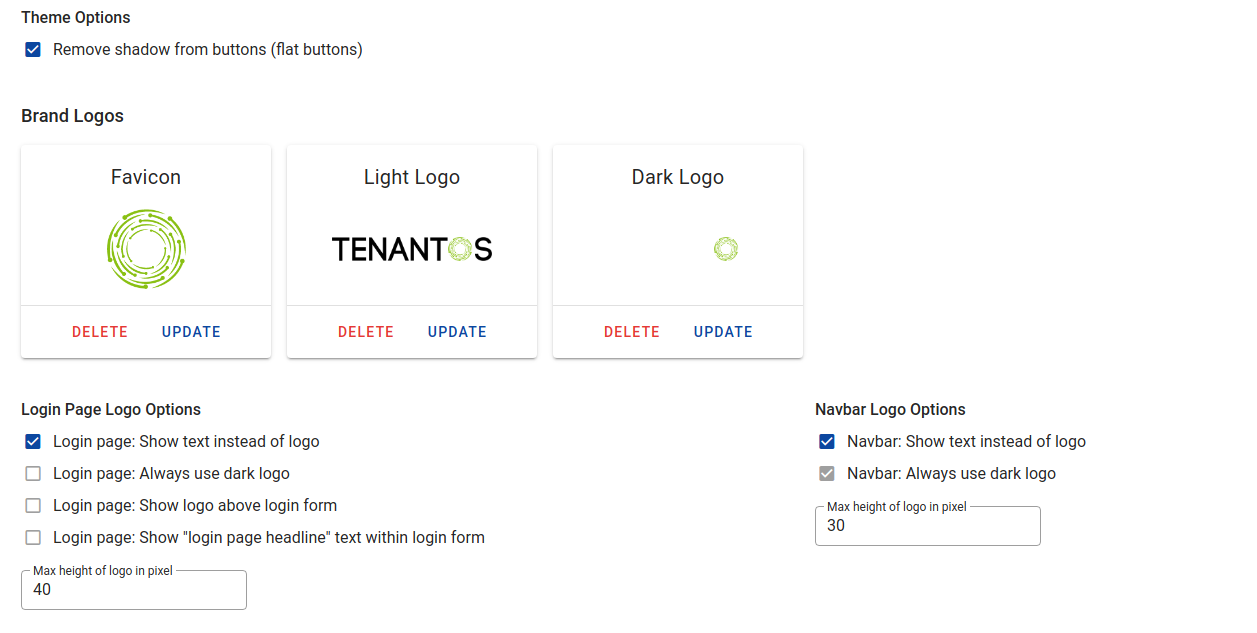
Custom Logos
You can upload your own logos (favicon, light / dark logo) and influence the way the logos are shown. The following options are available:
-
Login page
- Show text instead of logo
- Always use dark logo
- Show logo above login form
- Show "login page headline" text within login form
- Max height of logo in pixel
-
Navbar
- Show text instead of logo
- Always use dark logo
- Max height of logo in pixel
Every change is applied without reloading the page. If an option is unclear, you can try the option and see the effect directly (except for the login page).
Max height of logo in pixel
This option is useful if you want to change the size of the logo. Reduce the value to display a smaller logo.
Theme Options
Remove shadow from buttons (flat buttons)
Enable this option to make the buttons flat (i.e. buttons without shadow).
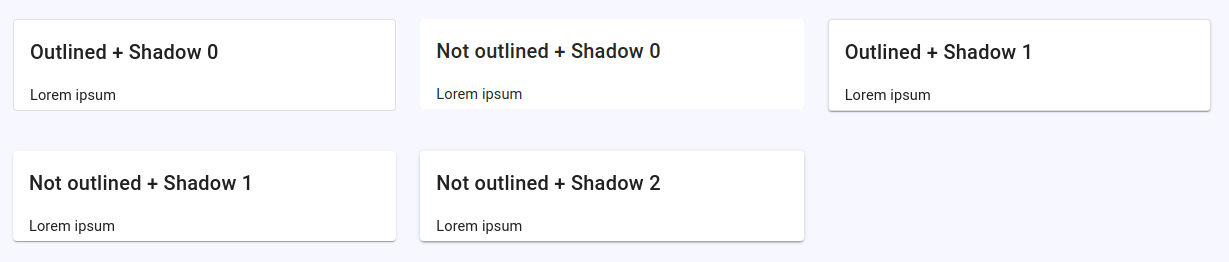
Outlined Cards
Activating this option adds a border around the cards, which is particularly useful when the card shadow is turned off or set to a low level.
Select card shadow strength
This option controls the intensity of the shadow around the cards. When the shadow level is set to 1 or 0 (no shadow), activating the outlined cards option can enhance the appearance of the cards. The default setting for the shadow level is 3 and the maximum shadow level is 25.
The setting only applies to the light mode.
Show important server notes at the top
When this setting is enabled, notes marked as important will be displayed at the top of the list, rather than in chronological order with the other notes.
Full length top bar
This option makes the top bar extend across the entire length, with the sidebar positioned below it. If the top bar and sidebar use the same colors, it's hard to spot any difference. However, the difference becomes more noticeable when two different colors are used.
Screenshot