Manage Remote Agents
Add a new Agent
Installing additional agents is easy. All you need is a server that meets the system requirements.
- At the sidebar, click "Remote Agents" -> "List Agents"
- Click on the plus button and fill out the form:
- Agent Name: You are free to choose the one you want. The name should be something you associate with the location.
- Hostname: The hostname of the agent. The hostname must resolve to the public server IP.
- IP: The public server IP.
- SSH Port: The SSH port.
- Root Password: The root password.
- Click the "Add Agent" button to start the installation.
Once the agent has been added in the web interface, Tenantos will automatically execute the installation. You don't need to install anything manually on the agent - the Tenantos main server handles the complete installation process automatically. Once finished, all required components will be configured and running on your agent server.
After the installation is completed, you can disable the SSH password authentication. Tenantos use SSH keys for secure internal communication.
Manage Remote Agents
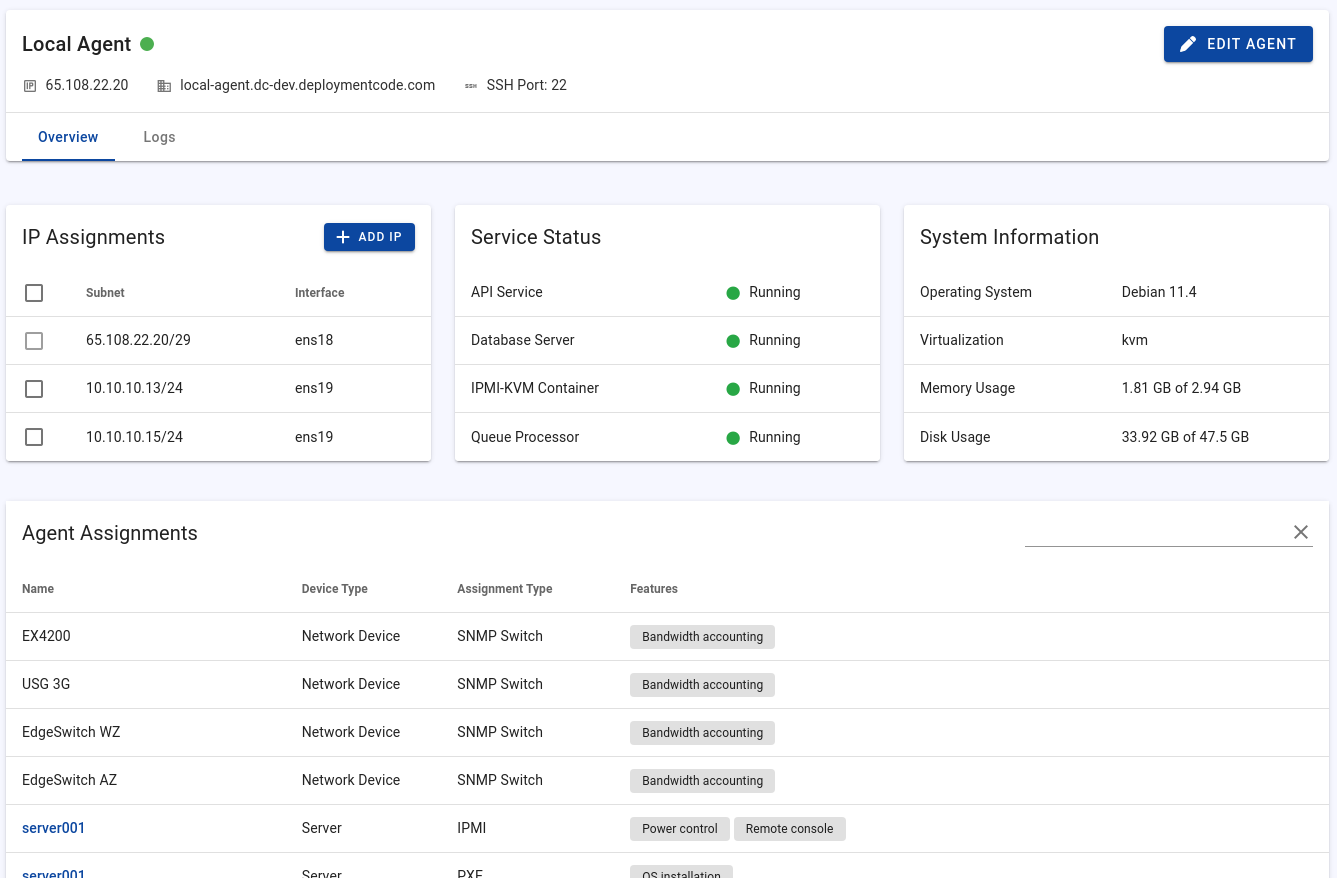
To open a remote agent's management page, click on the "Remote Agents" sidebar entry, followed by "List Agents". This will display all added remote agents, including the local agent. Click on an agent's name to open its management page.
Add Private IPs
If your IPMI or network devices are located in private networks, you need to include the agent into the private network.
In the simplest case, your network is flat, and you just need to add an IP to the agent from the private networks. You can do this assignment directly on the agent overview page and choose on which network interface you want to add the IP.
In more complex networks, you need to manually configure the network interface so the agent can access the private networks.
Service Status & System Information
At the "Overview" tab, you find general details about the server and the running services.
Agent Assignments Overview
The Agent Assignments table gives you a quick overview of which devices and servers the agent is assigned to and what functionality the agent is responsible for.
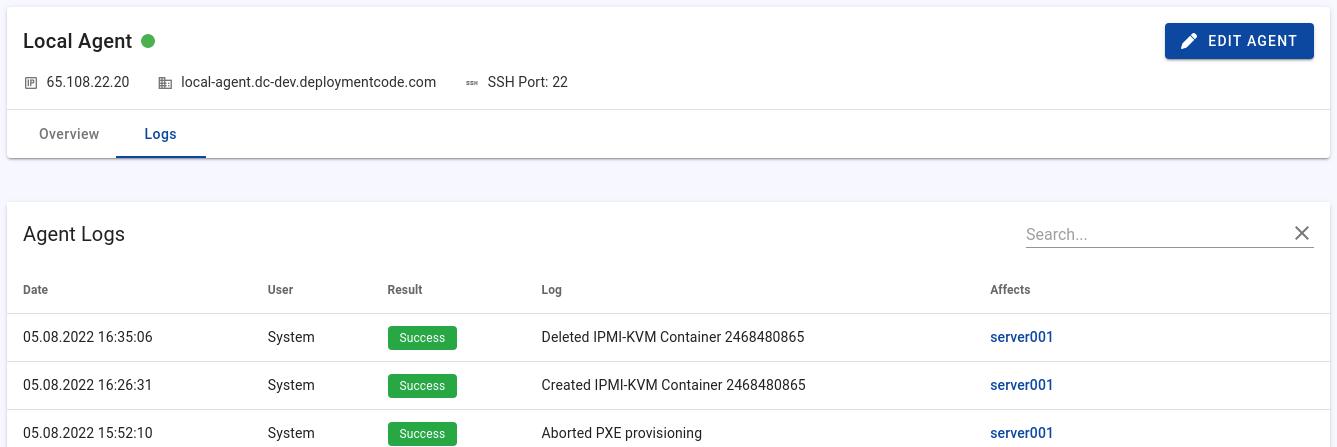
Tab: Logs
In the Logs tab, you can find the log files of the respective agent. This information is mostly only relevant when investigating problems.
Redeploying Remote Agents
You can redeploy an existing remote agent to reinstall the agent software on the target server. This functionality can be used for:
- Replacing the agent with a completely new server
- Reinstalling the agent on the same server
Existing agent connection assignments are not removed during redeployment.
If the agent is redeployed on the same server (without reinstalling the OS), existing private network configuration is retained. However, if the server is replaced or a different system is used, private network settings must be configured again.
If the reinstallation on the same server fails, reinstall the operating system. Ensure that all system requirements are met (see the system requirements documentation).
Screenshots